
- Klik New lalu klik di 'Manually configure settings'

- Pilih Internet Email

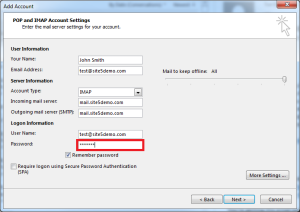
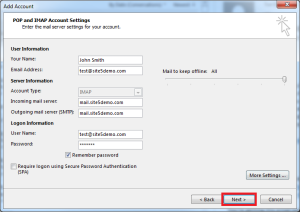
- Isi field yang ada sesuai dengan informasi yang terdapat di email 'Welcome to IdeBagus'. Gunakan gambar berikut sebagai panduan. Yang perlu diperhatikan disini, username harus berupa alamat email lengkap.
Incoming
mail server : mail.dnet.net.id
Outgoing
mail server : smtp3.dnet.net.id

Setelah
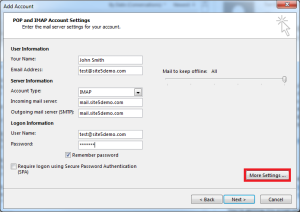
terisi semua, klik di 'More Setting'
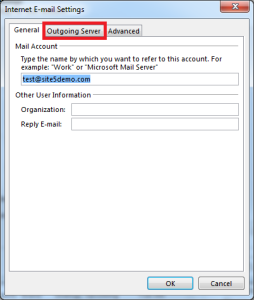
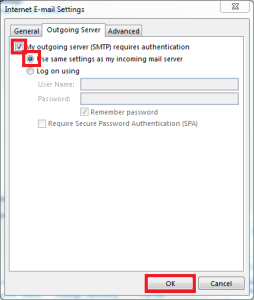
- Klik di tab 'Outgoing Server' dan pilih 'My Outgoing server (SMTP) requires authentication'. Biarkan setting yang lain (default).

- klik tab “Advanced” Port outgoing smtp nya diisi : 465/587 autentikasi (use the following type of encrypted connection) di isi dengan : ssl/tls
- klik tab “Advanced” Port incoming nya diisi : 110 autentikasi (use the following type of encrypted connection) di isi dengan : NONE
Setting up Microsoft Outlook 2010
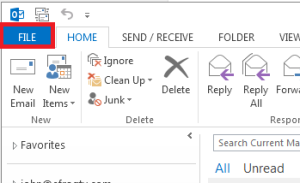
Open Outlook and select File.

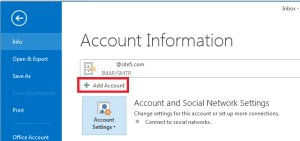
Click Add Account.

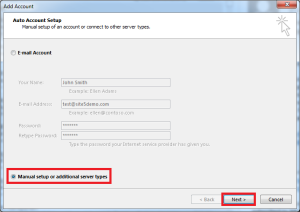
Check Manually configure server settings or additional server types
Click Next

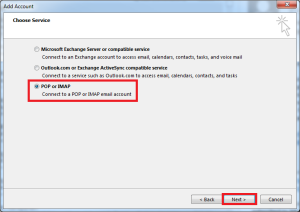
Select Internet E-mail
Click Next

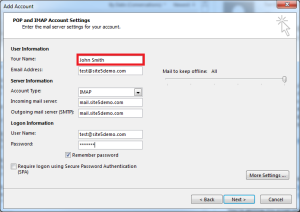
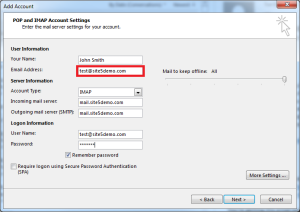
Enter Your Name and E-mail Address
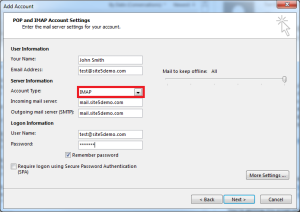
Choose IMAP as your account type
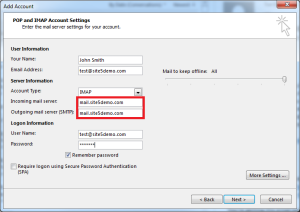
For Incoming mail server (IMAP), enter imap.one.com. For Outgoing mail server (SMTP), entersend.one.com
In Logon Information enter the e-mail address and password that you created in the control panel
Configuration of the SMTP server in Outlook 2010
Click More Settings

Select Outgoing Server and then My outgoing server (SMTP) requires authentication

Select Advanced. For Incoming server (IMAP) enter 993 and select SSL. For Outgoing server (SMTP) enter465 and select SSL.
Click OK

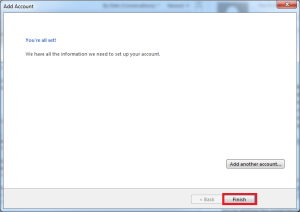
Click Finish

Microsoft Outlook 2013
This tutorial assumes you’ve already created your new email account in SiteAdmin or cPanel.
Now let’s learn how to setup that new email account in Outlook 2013, so you’ll be able to send and receive emails to and from that new email account.
1) Open Outlook
4) Click Manual setup or additional server types, then click next
Sumber : http://kb.site5.com/email/email-software/microsoft-outlook/how-to-setup-a-popimap-e-mail-account-in-microsoft-outlook-2013/
Terimaksih.Jika ada yang kurang jelas,bisa YM,CALL,tanpa dipungut biaya
BERBAGI ITU INDAH





0 komentar:
Posting Komentar